In the digital age, businesses are constantly seeking innovative methods to engage with their customers effectively. One such method that has gained significant traction is the use of AI Chat Assistant Bots.
These bots, powered by sophisticated algorithms and machine learning, are not just limited to websites; they can be integrated into web applications, providing a seamless interactive experience.
Here, we will explore how to create an AI Chat Assistant Bot, its use cases, and the benefits it brings to both websites and webapps, while also discussing the integration of Retriever-Generator (RAG) models and Agents equipped with tools.
1. Setting Up Your Bot
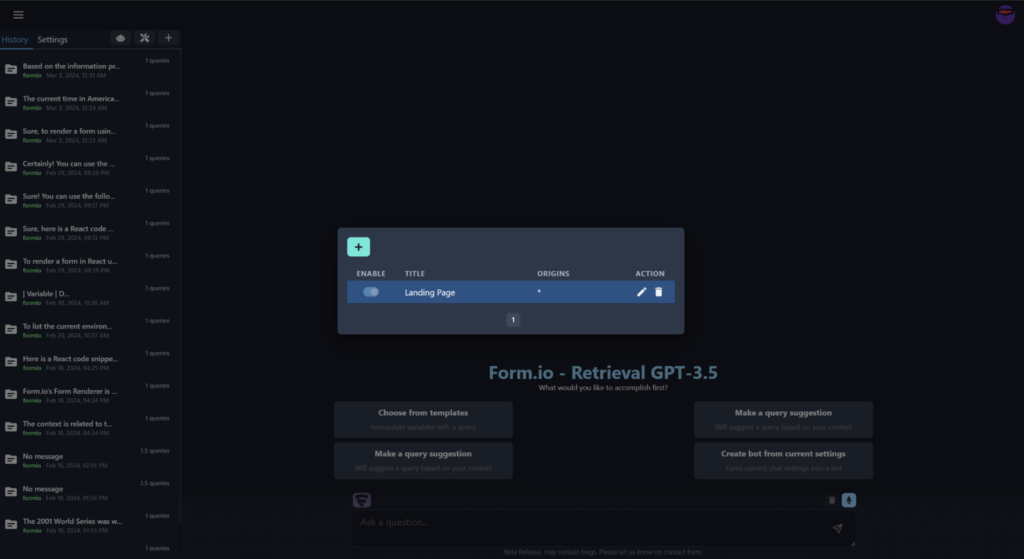
- Navigate to the “Bots” section of your dashboard.
- Click on the ‘+’ icon to create a new bot.
- Provide a ‘Title’ for your bot, for example, “Landing Page”.
- Set ‘Allowed Origins’ to specify where your bot can be embedded. You can use ‘*’ to allow any origin or add specific URLs to restrict it.
2. Customizing the Bot

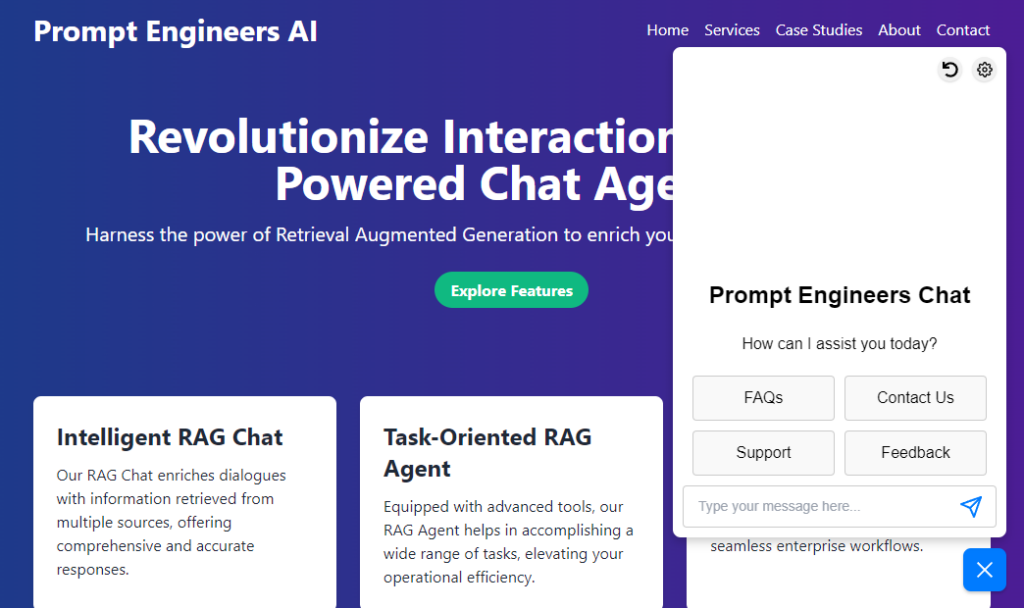
- Choose the primary and secondary colors for your bot to match your branding.
- Customize the ‘Welcome Message’ that users will see when they initiate a chat. For example, “Prompt Engineers Assistant — How can I assist you today?”
3. Embedding the Bot
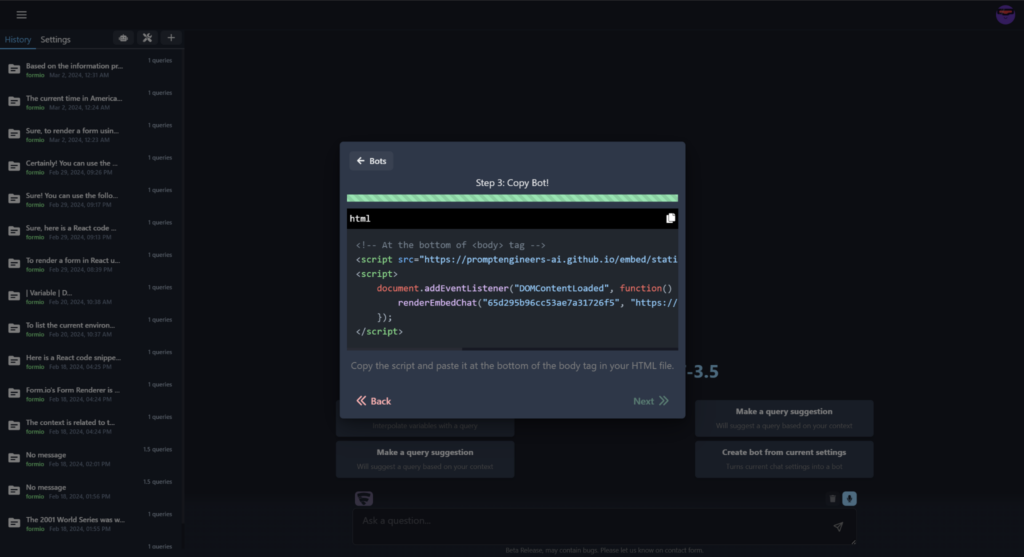
- Copy the provided HTML script.
- Paste the script into the HTML file of your website or web app, ideally at the bottom of the <body> tag.
- The script will asynchronously load and render the bot on your page when the DOM content is fully loaded.